Configuring your Google Service Account is important so that you can view the latest download figures and statistics in the dashboard.
It also allows us to update your app automatically on a regular basis, which significantly improves performance and helps to avoid errors.
1. Locate the account holder's address
To find the email address associated with your Google Developer Account, visit the following page: https://play.google.com/console/u/1/developers/
Info: If you already know your account holder address (usually the office address – as a tip), you can skip this step and go directly to point 2.

2. Notify account holder address hello again
Contact support@helloagain.at and provide us with your account owner email address.
We will then send you an invitation to your app's "Firebase project." Please accept it as shown in the screenshot:

3. Enable Google Play API & Reporting API
Open the following link with the account you just connected to Firebase to activate the Developer API: Google Play Developer API page (link)
Open the following link with the same account to activate the Reporting API:
Google Play Reporting API (link)
Ensure that the correct Firebase project is selected (for Google Play Store owners, there should normally only be one project available) – you can select this in the top left corner, as shown in the screenshot.


So you have activated two identical-looking APIs that do different things!
4. Create a service account in Google Cloud Project
Open the following link to access the service accounts page:
Add service account user (link

-
The name
hello-again-google-play-apiassign for the new service account -
Then
Create and continue -
Here is the role
service account userselect → Next → Done

The service account ID is created automatically after entering the name.

-
Save the email address you have created; you will need it later.
-
Now, with the newly created service account at
actionsonManage keysclick

Continue with ADD KEY and Create new key

At the key type must JSON be selected

After clicking on Create a file with the extension .json downloaded, which are then in the dashboard under App Build Settings → Play Store Service Account hochgeladen werden muss

5. Activate your work account in Google Play
-
In the Google Play Console
 Google Play for business | Launch and monetize your apps | Google Play Console Users and permissions open → Invite new users
 -
Enter the service account email address here
-
Account permissions: Assign admin rights and invite users


The service account must now be visible and active in the overview.

6. Activation in Firebase
Ensure that "Google Play" is connected in Firebase under Settings → Integrations: (Link)
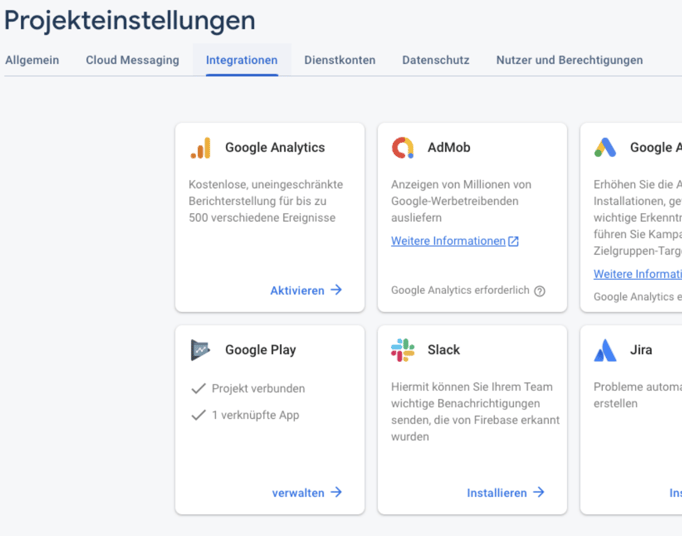
If this is not yet the case, click on "Link" (you must be logged in with the Google Play account owner to do this).
When connecting, activate both app deployment and Crashlytics:

7. Copy the cloud storage URI
In order to accurately retrieve the download figures, we require additional information from the Google Play Console, which you must provide to us.
1. Open the Reviews section in the Google Play Console.
2. If you see the following view as shown in the screenshot, please copy the Cloud Storage URI.

The copied URI looks like this:
gs://pubsite_prod_rev_11111111111111111111/reviews/
Please send it to us. With this ID, we can close the service account, provided that all previous steps have been completed.